Showing posts with label Sewing. Show all posts

Saturday, January 08, 2011

Pillowcase Dress

I love the look of these dresses and finally decided to make one. I didn't have any pillowcases that were cute enough to use for a dress that I was willing to cut up. So I just picked some fabric from my stash, sewed a tube, and hemmed the bottom. This is approximately size 6, but could easily fit a smaller girl due to the adjustable straps. It would end up a couple inches below her knee instead of right at the knee like the rest of my size 4 and 5 dresses. It could also be used by bigger girls as a top or over pants. The adjustable straps are about 10" long so there's a lot of room for growth.

I used these directions that I found from a swagbucks search. Her instructions are really easy to follow. (I copied them into a Word document if anyone's interested so it prints out on only 1 page.)

Traditional pillowcase dresses make a casing on the top front and top back and thread the ties through these casings. This can create a strangulation hazard, however, so I like her way of doing it better. She inserts an elastic into each casing, sewing it in place at each end. Then either make a casing for each armhole and thread the ties through the casings or sew on double fold bias tape, extending by 10" at each end to make the ties.

I didn't bother to print out the instructions so by mistake I made the elastics 9" each instead of 6". I think it works anyways (I'm certainly not about to rip it out to fix it!)


I feel like it needs something. Maybe I should have enclosed the hem in the double fold bias tape too? Or does the fabric have enough detail that the dress doesn't need anything else added to it?

I also made a sewing apron which turned out awesome. I'll take pics and post soon.

p.s. I do not take credit for the colour of my kitchen wall. That was our landlord's mother's choice. Definitely not mine.

Saturday, December 11, 2010

I'm done!

I'm all done. Woohoo!!!

What a day. I woke up bright and early and immediately remembered that when I put my sewing things by the door, I'd forgotten my shirt! Grabbed that first thing, then went off to school. I got there around 8:30 and sewed like mad until 12:20 when I finished the shirt. I ran down 3 flights of stairs for a sandwich, then back up and scarfed it down before going back to practice for the sewing test.

Sewing machine adventure #1
My sewing machine had been acting up all morning. It would randomly skip stitches, and would not catch any at all when backstitching. I managed to make it through my top but realized that I could NOT do my sewing test on that machine.

It is almost the end of the semester so all of the students in other classes have a lot of projects to work on. My teacher doesn't mind if they work during our class, as long as they are quiet and don't use the machines that we need. She had them leave during the test, but said they could leave their things.

There are 3 different models of sewing machines. The REALLY old ones are at the back of the class, the sort of old ones are in the middle, and the best and newest are at the front. My machine is in the front. Unfortunately, all of the best machines were taken. A few by people not in my class. >:(

Sewing machine #2
So I sat down at a machine that is sort of old. There's no speed control, no computer to make the needle stop down every time (very helpful when trying to pivot in place), and it did not automatically cut the thread. I very quickly realized that I could not do my test using a machine that I had zero experience with.

Sewing machine #3
I decided to move up to one of the newer ones and had to move aside the stuff of whoever was NOT in my class that had been using that machine. I felt bad about touching their things but hey, I don't come in during their class and use their machine. I paid to take this class so during my class time, I need proper equipment and they are not in my class and do not have the right to be there and prevent me from using the machine. Anyways...

This machine was the same model as mine, but I couldn't figure out some things. The speed control felt different, the needle would not stop in the down position (my machine stopped with the needle down every time I stopped sewing, until I cut the thread.) and the knee lever for raising the presser foot was about a foot away from my knee! I ended up having to walk it (turn the dial on the side by hand) the whole time because I couldn't control the speed or where the needle would end up. Very frustrating but I got it done and got 10/10 on it!

This is what we had to sew:


Back of skirt


Shirt front. (The white bits is from the camera flash shining off the hardwood through the shirt)

Darts in front

Keyhole closure in back (still needs the closure but didn't count against my mark).

Side slits


The shirt is a bit see-through so it will need an undershirt. I may try to take the sides in a bit, it has no shaping there so it looks "like a potato sack" as my husband says.

I won't know what score I got on my written test until after Christmas when they post grades online but I added up the rest of my scores. I also got 5 bonus marks for having my binder of samples neat and organized. So my total score is between 102 and 103% (depending how I did on the written test.) Not bad eh? Ultimately, I didn't do it for the mark, I did it to learn how to sew better, but the grade feels good too. :o)

Friday, December 10, 2010

Almost done

I'm almost done my course! Tomorrow is my last class. I'm a little sad, but also very relieved. It's taken A LOT more work than I thought it would be, however, I'm very satisfied. It was well worth the time and effort.

Tomorrow the sewing lab opens at 8am. I plan to be there as soon as possible, hopefully I can be there close to 8 - barring mommy emergencies. Then I'll have 4 hours to finish the shirt. I think I'll be cutting it a bit close, especially if I factor in time for life necessities like bathroom breaks and eating, pesky things those are when I'm trying to get something urgent done ;)

Between finishing the last 3 samples for my class, practicing for the sewing test, studying for the written test, going to my parent's for dinner and for the kids to decorate their tree, and doing laundry, I managed to start sewing some Christmas gifts. Well okay, I only sewed one, but I have some more cut out and ready to sew. Sorry, no pics until after Christmas.

Well okay, just one.
That's all you get! :D

Sunday, December 05, 2010

Skirt is done!

Skirt is finished and marked and I got 20/20! Woohoo! She said she tried to pick on it, to find something wrong and couldn't. I'm so happy. I put SO much work into it.


 She was really impressed with the name tag I'd put on it. It's an iron-on label from Fabricland.


Muslin shirt is finished. It's very plain and, as I'd thought, too big. There are some pleats in the sleeve, which isn't good. It's supposed to be totally smooth. So instead of using the no-thread method (described in the previous post) of sewing the sleeve to the armhole, I'll use gathering stitches for the real shirt. It allows for better control of exactly where the fabric goes, and helps to prevent unwanted folds. It does take more time which is why I prefer the other way, but I think it's necessary for this project.
Front

Darts in the front

Back with a keyhole slit
 Below is the shirt I will hand in. So far I have completed:
  • cut out everything
  • fused neckline facing
  • sewn darts
  • serged all edges except where the necklines are sewn together
  • sewn back centre seam
  • sewn front to back at shoulders and sides
  • sewn neckline facing pieces together

 I still need to:
  • attach neckline facing
  • sew sleeves on 
  • attach a hook at the top of the keyhole opening
  • sew the bottom hem
Close-up of fabric
I also handed in several samples (neckline facing, set in sleeve, released darts, and pleats - all of which I got perfect scores on) and was assigned two more (round pockets and square pockets). She lets us do the samples over again until we are satisfied with our mark so, thanks to persistence, I have pretty good marks on all of them. There's one I got back yesterday that I got 7/10 so I'll be redoing that one. I know why - I rushed it, trying to get it done inside of class time. I'll take my time and do it right (hopefully).

I tried to stay late last night but they closed the sewing lab at 5pm. I need to finish the rest of the shirt before 1pm next Saturday and it has to be done on the school's sewing machines. So I need to figure out when I can go in to get that done. For now, I'm kinda burned out on sewing so I probably won't sew at all today. Tomorrow, while Five is at school and One is napping, I'll try to get the samples done.

Oh, and I found my camera :D It was in the bottom of my purse the whole time!

Friday, December 03, 2010

Shirt Project

So sorry for no pictures! Still searching for my camera.

I have 2 classes left: tomorrow and then next week is the last one. So next week the shirt will be due, which means that if I need any guidance for it, I need to get it tomorrow. My plan is to finish the muslin shirt tonight and try it on and hopefully it will fit. I'm not sure if I'll have time to modify it even if it doesn't fit.

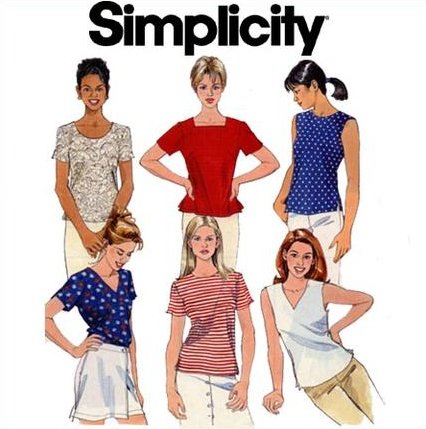
This is the pattern: Simplicity 8523, size 14, view A (centre bottom view).


So far, I've completed:
  • front darts
  • back seam
  • sewn front to back at shoulders and sides
  • neckline facing
  • one sleeve

Still have to do:
  • second sleeve
  • hem
  • closure at top back
I find this to be somewhat complicated. I've never done a back slit at the top of a shirt before. Figuring out how to attach the lining was tricky and I'm still not sure I did it right. Attaching the sleeve was tricky, as always. I was able to use some of my teacher's suggestions for making the sleeve fit the armhole. The sleeve has to be slightly gathered in order to fit. This can be done by using gathering stitches or with the following method:
  • remove thread from needle
  • place sleeve under the fabric as though you're going to sew in gathering stitches
  • lower the presser foot
  • set stitch length to 2.5
  • place your finger behind the presser foot, tight against the foot and the plate. It should be directly in the way of the fabric coming out.
  • sew (without thread in needle)
  • fabric will gather into tiny folds against your finger. keep you finger there until you've "sewn" the whole curve of the sleeve.
  • remove fabric from the machine and check the folds. If you feel it needs some more folds or, as often happens to me, there seems to be some areas that didn't crease as well, you can just go over those areas again.
  • it will look like it's been crimped. This slightly gathers the fabric, allowing you to easily fit it to the sleeve opening in the top. It's also a lot faster and uses less materials than using gathering stitches.
  • with top right side out and sleeve wrong side out, slide the the sleeve opening into the sleeve (right sides together and matching notches, dots, and seams). It's much easier if the sleeve is on the outside since it is the larger... piece of fabric and the one you are reducing in order to match it to the sleeve opening on the top. Pin, sew, (don't clip!) and serge all the way around.
The neckline is very high, it almost feels like it is choking me. I'm wishing I'd chosen view D (top left in first photo). I don't have time to trace and cut out a new pattern so A it must be for my project. I can make view D after.

I'm right in between size 12 and 14. (Note: Pattern sizes do NOT correspond to clothing sizes in stores!) Unfortunately, one pattern envelope has sizes 8, 10, and 12 and the one I had has sizes 14, 16, and 18. If 12 and 14 were on the same paper, I'd just cut out the pattern right in the middle.

With my skirt, I'm also between size 12 and 14 and got size 12 and had to enlarge it. Which was difficult - I pretty much had to draft my own pattern based loosely on the one I bought. This is why I decided to go to the larger size this time. I'd rather have it too large - it's much easier to shrink than to enlarge, and it's not strictly necessary to shrink it in order to be able to wear it. If the shirt's too small, I can't wear it - period. If it's too big, it might not look perfect but at least it's wearable. I can always use another laundry-day shirt ;) (and eventually I hope I'll get it right and it will fit AND look good :D )

Thursday, November 25, 2010

Christmas Bibs for One!

Bib under construction.

I can't get enough of those blue eyes!


One getting into my sewing supplies. Those two thread bobbins entertained him for about 1/2 hour!


I debated between making 1 red bib and 1 green bib but decided instead to make 2 bibs that are red on one side and green on the other. That way I never have to hunt for the red bib or green bib, I can just turn it around to match or contrast with his outfit. I still have some fabric left over. Enough for 2 more bibs or something else... I'm not sure yet what I'll do with it.

Skirt is nearly done

Well, so much for posting every day. Oh well, the skirt is almost done. I literally have to do one stitch on the machine at school (one dart is 1/8" shorter than the opposite one) and it will be finished.

Front. Not much to see here. 4 darts and an invisible hem.

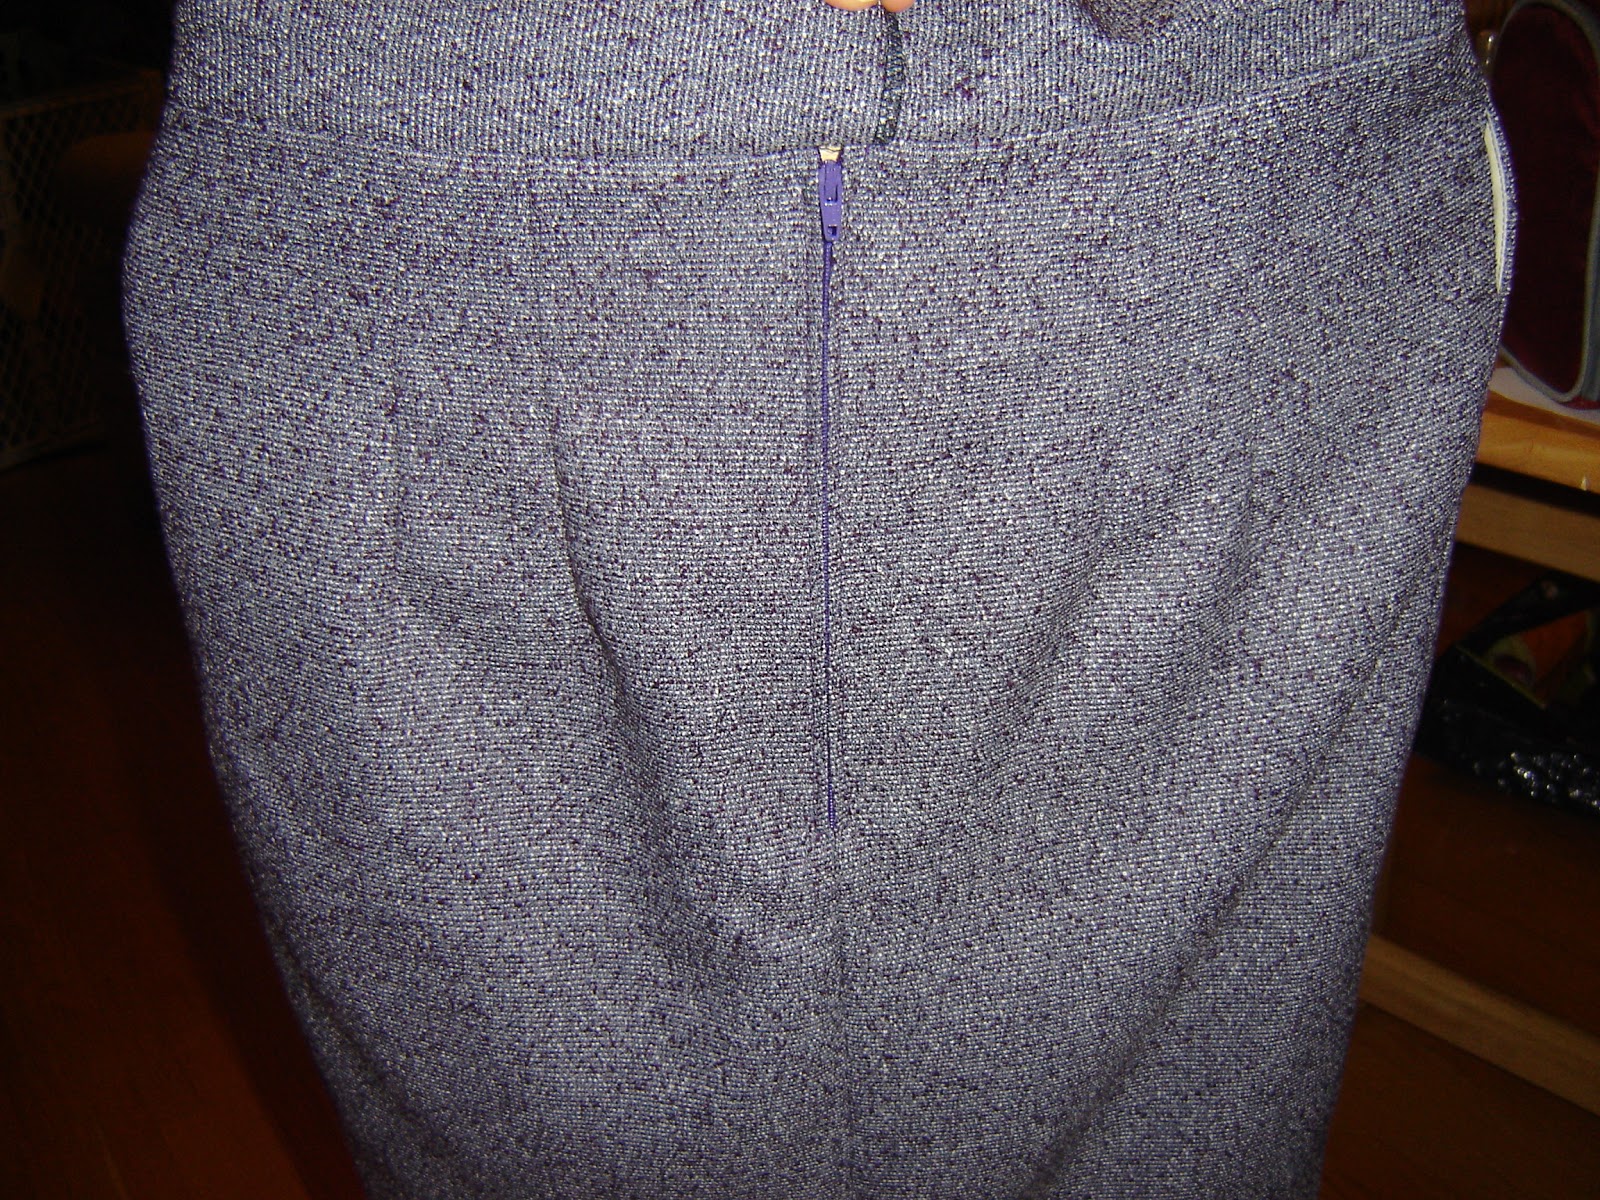
Back. You can see a tiny bit of an inseam pocket on the left, the zipper, back slit, 4 darts, and an invisible hem.
 

Monday, November 15, 2010

Bib and Shirt for One

This picture was taken in August I think. Shirt is a size 2. It's a bit big, but it's the smallest t-shirt pattern that I have. I LOVE the fabric. It is so vibrant.
Bib is also made by me. A simple lightweight jean that goes with everything and makes his eyes POP. There's cotton flannel on the back, but I have a few different jean bibs for him so I'm not sure which fabric is on the back of this particular bib.

One's costume (more pics)

These were so cute that I had to share them. (You can see pattern details here.)


I have a secret. I forgot to remove one of the pins, in the armpit section of the costume. So every time I picked him up to reposition him, I was poking him with the pin. And I thought he was just crying because he was tired. *Mommy Fail*. I'm so sorry One. It is a testiment to your sweet disposition that we STILL got some amazing pictures.

Sunday, November 14, 2010

Skirt progress

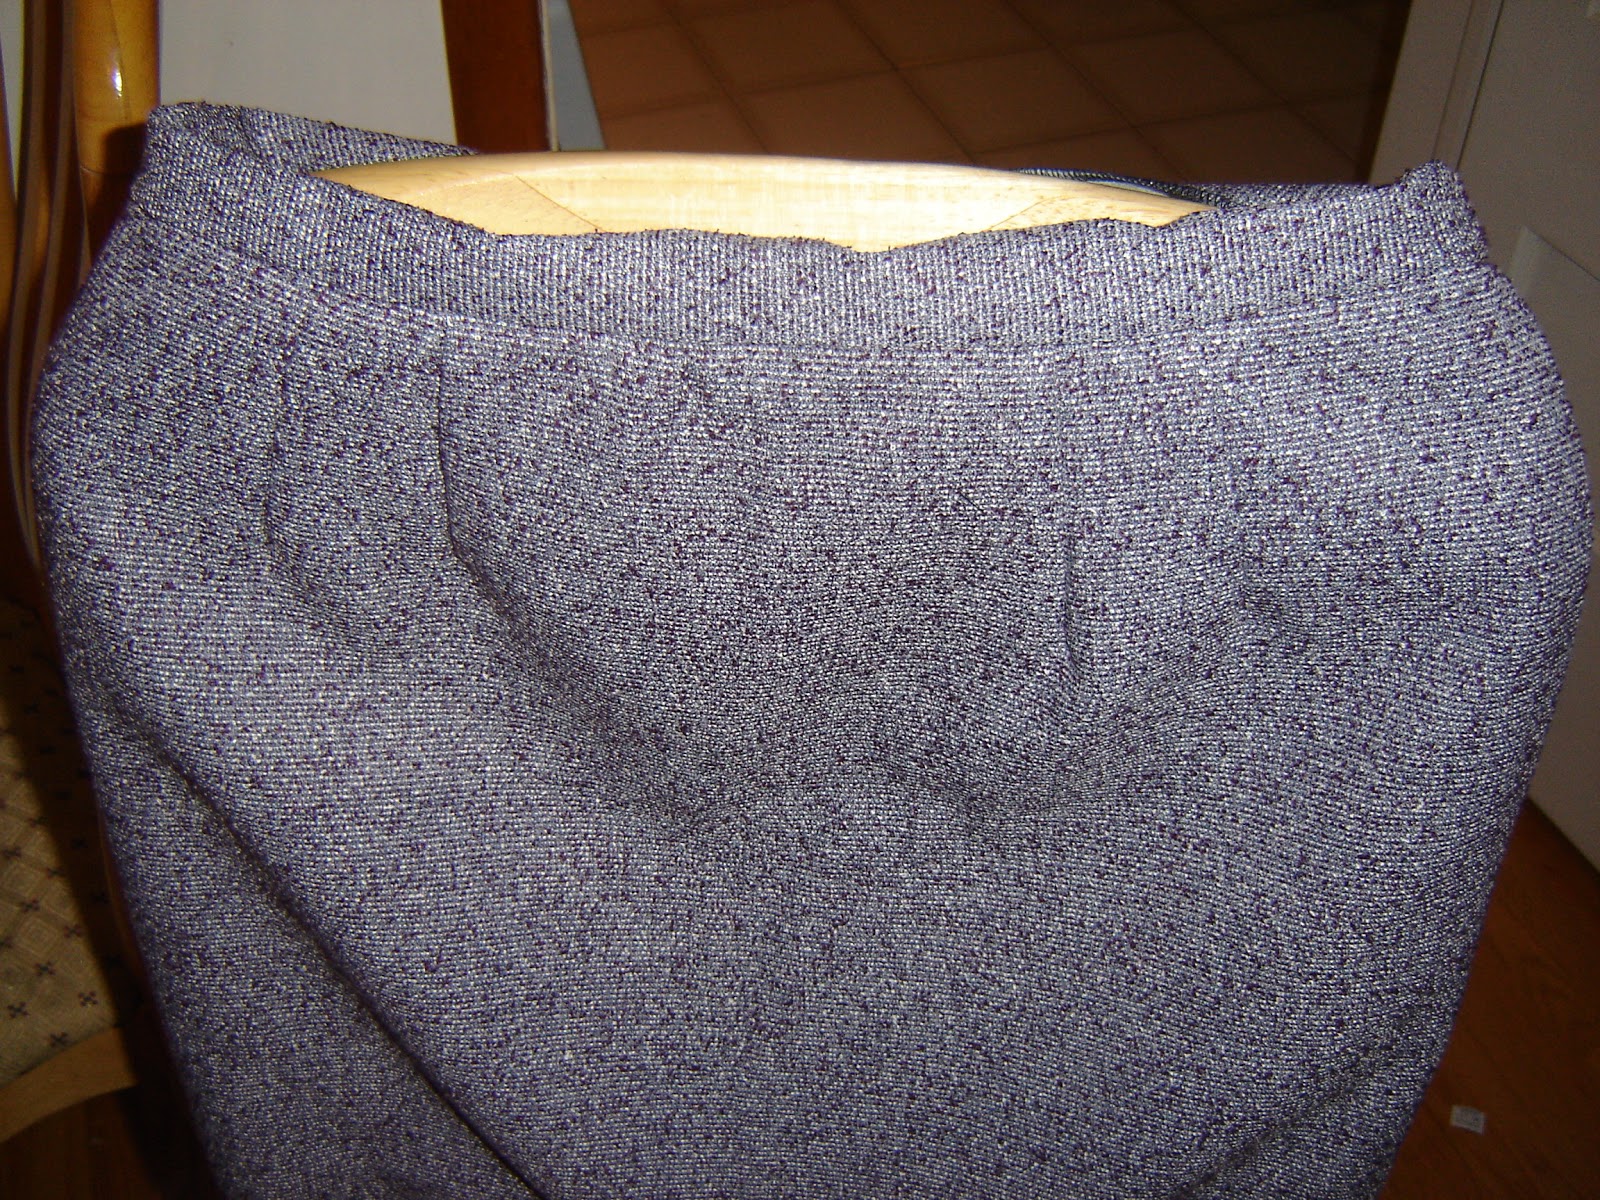
Front 
(the sides don't actually bulge out like that, it's just the chair pushing on it.
There's a gentle flare at the hips)


Side
(There's an inseam pocket there, it's just hard to see... which it's supposed to be.)

Back 

I still need to finish the waistband, attach a button, finish the back slit, and hem the skirt.

Anna Q

Friday, November 12, 2010

Final Skirt Project

I have all of the pieces cut out for my final skirt project. On the left is the front panel (folded in half) and the 4 pocket bags. On the right are the two back pieces and 3 waistband pieces (with interfacing laid on top.) I have to put it together at school, on their machines. They have a really cool machine for fusing the interfacing, I'm looking forward to trying that out.

Closeup of the fabric.

Anna Q

Monday, November 08, 2010

Bib for One

I made this bib a couple of weeks ago. I used my own pattern, created specifically for my son. (You can buy bibs made from this pattern from my store on Facebook - just search "Joyful Journey Baby".) I think I got this jean fabric in the scrap bin at Fabricland. I get most of my fabric from there. The edges had a wonderful fringed look to them that inspired me.

Before sewing the bib together, I used a scrap to sew on a fake pocket. I decided against putting a real pocket on because I was concerned about it not getting clean enough if he stuffed bits of food or whatever else in there. So the pocket is sewn shut.

I usually sew the bibs right sides together, leaving a gap, turn it right side out, and topstitch. This time I just topstitched, wrong sides together, all the way around. I then threw the bib in the washer and dryer a few times (just kept throwing it back in everytime I did a load for a few loads) and it created the fringe that I love so much.

The sewing was so much easier than sewing, turning, and sewing again. Also, I think that because the denim is so thick, turning and topstitching would have left a very bulky seam allowance and would not have looked very good. I sewed one up in cotton flannel to see how it would behave in the wash, to see if it will work the same way and look nice or if it will just fall apart. I haven't washed that one yet so I'm still in anticipation of how it will turn out. I love this one though. It has heavy duty snaps (I don't like bibs with hook-and-loop tape. It sticks to everything in the washer and dryer).

I like how it turned out and I'll be on the lookout for more jean fabric on sale.

Anna Q

Sunday, November 07, 2010

Mom's Birthday Present

Since I didn't have time to blog yesterday, I decided to do two blogs today. So here's a project I made in September. The pillow is 14" square. I used this tutorial and it was really easy. I've hesitated to make pillows because I hate hand-sewing to whipstitch the last seam closed, and was intimidated at the thought of putting in a zipper. It's not as hard as I thought. It could easily be made in one miraculously uninterrupted evening. I rarely get one of those so I think this took me 2 evenings and a nap time.

I made this for my mom for her birthday. Her middle name is Joy.

I used two separate fabrics - the solid pink and the pink, white, and yellow stripes.
The "joy" is hand embroidered.

The back

Hidden zipper

Hidden surprise sewn into the seam allowance - Happy Birthday!

One's Halloween costume

I decided to make One's Halloween costume this year. I probably would have made Five's, but he asked me to make him an Optimus Prime costume with cardboard boxes so that he could really transform. Um, sorry dear. No can do. He got a Walmart Optimus Prime costume instead. Since One has no preference, and no say, in what he wears (hehe) I can still get away with picking out his costume. I looked through some patterns and this pumpkin costume caught my eye.

The pattern is Simplicity 2788, view D. It comes in sizes 1/2, 1, 2, 3, and 4. I made the hat in size large (It comes in small, med, and large) because he has a big head for his age, and the rest is size 2. I also used the booties from view A, done in the same fabric as the jumpsuit from view D.

I've used Simplicity patterns in the past and this one met my expectations. The directions are easy to follow and the finished costume looked quite a lot like the one pictured on the pattern envelope.

I could not find the suggested fabrics so I used fleece for the orange part and sweatpants material for the green part. The black applique is cotton flannel. The closure in the back of the jumper is a long Velcro strip. The pumpkin part also closes with Velcro at the shoulders. I did get some pumpkin buttons but forgot to sew them on. I plan to sew them on the top of the Velcro so it looks like a button closure but will actually be Velcro.

I had the misconception that sewing my kids' costumes would save me money. Hah! Between the pattern, fabrics, and notions, (Not even counting the hours and hours it took to put it together) I spent about $60 on this. Ouch! I paid $25 for Five's costume for comparison. The payoff is that this is much better made, will last for many years, and I have the satisfaction of having sewed my child's costume. I don't know what it is about that, I feel like I've passed some sort of milestone as a mother. I'm not sure I will ever do it again, but I'm glad to have sewn at least one costume for my kids.

Some major things that I learned while making this are:
  1. I suck at fusing paper-backed fusible interfacing. Seriously. You get one shot at it and I failed spectacularly. It just wouldn't stick, no matter what I did. I ended up tearing the interfacing off and using a zig-sag stitch to applique the face on.
  2. You CANNOT fuse onto fleece!!! It will MELT! (all over your brand new iron). Fortunately the inside and outside pieces are almost identical so I made the ruined, melted piece the inside piece. I freaked and grabbed some scrap fabric and ironed that, which got most of the still-molten fleece off of the iron and onto the fabric. After it cooled, Hubby showed me that the rest of it easily scraped off. Phew.
  3. I suck at sewn-on applique. By this point I'd already failed at fusing the interfacing and ruined half of the fleece so I just did it the best that I could, wobbly lines and all.
All in all, I'm glad I did it. It will fit him for many years (Five wanted to try it on so I let him and it fit quite well!)

They can use it for dress up if they wish, and it was a great learning experience. And I have the satisfaction of being able to say that I once sewed a Halloween costume lol. Plus the jumper part can be used all winter. I think it looks very Christmas-y with red socks and maybe a red bib.

I did modify it to add snap tape to the inseam for easier diaper changes. I probably should have made it in size 3 so it will fit him longer.


Anna Q